SQL Server Agent Security
Many
changes were made to the security model related to the SQL Server Agent
in SQL Server 2005. In the past, everyone could view the SQL Server
Agent. Starting in SQL Server 2005, logins must be a part of the sysadmin server role or assigned to one of three msdb database roles to be able to view and modify the SQL Server Agent. The SQL Server Agent node does not appear in the Object Explorer tree if the login does not have the appropriate permissions. Following are the msdb database roles and their basic permissions:
SQLAgentUserRole—
Users with this permission can create and manage local jobs and job
schedules that they own. They cannot create multiserver jobs or manage
jobs that they do not own.
SQLAgentReaderRole— Users with this permission can view jobs that belong to other users in addition to all the permissions associated with SQLAgentUserRole.
SQLAgentOperatorRole—
Users with this permission can view operators and alerts and control
jobs owned by other users. The job control on jobs owned by other users
is limited to stopping or starting and enabling or disabling those jobs.
SQLAgentOperatorRole also has all the permissions available to SQLAgentUserRole and SQLAgentReaderRole.
SQLAgentUserRole
has the fewest privileges, and each subsequent role has increasing
levels of security. In addition, each subsequent role inherits the
permissions of the roles with fewer permissions. For example, SQLAgentReaderRole can do everything that SQLAgentUserRole
can do and more. Refer to the topic “Implementing SQL Server Agent
Security” in SQL Server Books Online for a detailed list of all the
permissions related to the new database roles.
Managing Operators
Operators are accounts
that can receive notification when an event occurs. These accounts are
not linked directly to the user and login accounts that are defined on
the server. They are basically aliases for people who need to receive
notification based on job execution or alerts. Each operator can define
one or more electronic means for notification, including email, pager,
and the NET SEND command.
To add a new operator, you expand the SQL Server Agent node in the Object Explorer and right-click the Operators node. Then you select New Operator from the right-click menu. Figure 2 shows the New Operator screen, with many of the fields populated for the creation of a new operator named LauraG.
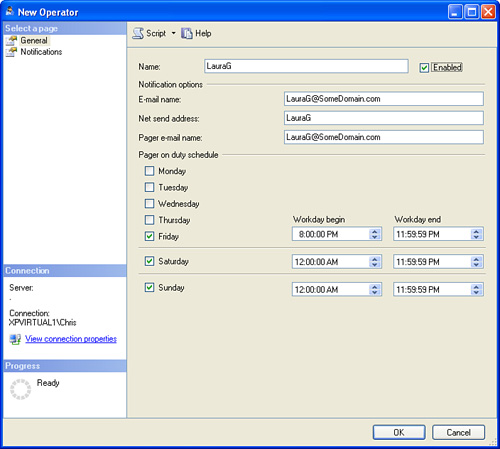
The General page of the New
Operator screen allows you to enter the name of the operator, the
notification options, and the “on duty” scheduled for the operator. The
operator name can be any name, but it must be unique within the SQL
Server instance and must be no more than 128 characters. The operator
name can be the same as another login or user on the server, but this is
not required.
The
notifications options are the key to operators. You create operators so
that you can then define notification options and have messages sent
from SQL Server.
If you use the email
notification option, the email address you specify must be a valid
address that can be reached via Database Mail or SQL Mail. One of the
two mail options must be configured before the email functionality will
work. If Database Mail is configured, the email is sent via an SMTP
server. To send email with SQL Mail, SQL Server must be able to access a
Microsoft Exchange server, and you must have the Extended MAPI client
installed on the SQL Server machine.
The NET SEND
notification option causes a pop-up window to appear on the recipient’s
computer; this window contains the notification text. In the Net Send
Address text box, you specify the name of the computer or user that is
visible on the network to the SQL Server machine. For NET SEND
to work, the Messenger service on SQL Server must be started. This
Messenger service must also be started on the machine that is receiving
the NET SEND message. You can test the basic NET SEND capabilities by executing NET SEND at the command prompt. The basic syntax for NET SEND follows:
NET SEND {name | * | /domain[:name] | /users} message
The following example uses the NET SEND command to send the message “Test net send message” to the operator LauraG:
NET SEND LauraG "Test net send message"
The
final notification option is through a pager email address. Pager email
requires that third-party software be installed on the mail server to
process inbound email and convert it to a pager message. The methods for
implementing pager email and the available software are dependent on
the pager provider. You should contact your pager vendor for
implementation details.
If you implement pager
notification, you can also define the pager schedule for the operator.
The Pager on Duty Schedule section of the New Operator dialog allows you
to define the days and times when the operator will be available to
receive a page. The General page includes a check box for each day the
operator can receive a page. It also includes the Workday Begin and
Workday End settings, which you can use to define the valid time periods
to receive a page.
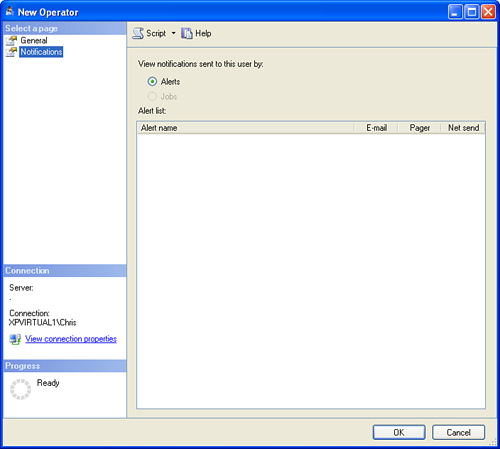
The other page available
when defining a new operator is the Notifications page, which displays
the alerts and jobs for which the operator will receive notifications.
For a new operator, the Alert List or Job List is empty, as shown in Figure 3.
You’ll have a better
understanding of the usefulness of operators after you read the
following discussions of jobs and alerts. Jobs and alerts can have
operators linked to them for notification purposes.